How to Transfer Files from Mac to iPhone without iTunes 2019 Guide
Part 1: Only Transfer Photos from Mac to iPhone with iTunes
Transferring files between your Mac OS and your iPhone can come easily with the use of iTunes. iTunes installed on your Mac allows you to transfer a limited collection of media files. However, using iTunes to sync Mac files on your iPhone will inevitably result in data synchronization on your iPhone.
To ease the transfer process, it is better to update iTunes on your Mac to its latest version to avoid issues such as "iPhone does not connect to iTunes". Go to the App Store > Updates and your Mac will automatically check for updates. If a new version of iTunes or Mac OS is available, click to install and update your iTunes to the latest version.
Follow the listed steps below to sync Mac files on your iPhone with iTunes:
Step 1: Connect your iPhone to Mac with a USB cable. If it does not open automatically, you need launch iTunes.
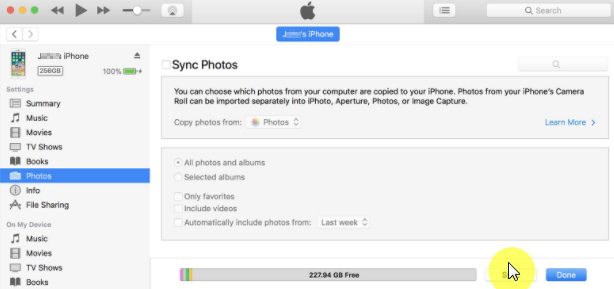
Step 2: Tap the Device button and choose Photos.
Step 3: Tick the box next to Sync Photos. Then scroll the Copy Photos drop-down menu and choose your selection.
Step 4: Tap Sync to start importing Mac photos to your iPhone.
Part 2: Why You Need D-Port Pro instead of iTunes
As earlier said, syncing your data files from your Mac to your iPhone can be really tasking when you have to use iTunes. That means you have to use your data which results to the extra cost. But you can cut away the annoying things while using iTunes. D-Port Pro will help you to copy your files to avoid syncing and allows you to even copy wirelessly. It is the best software available for transferring your files from Mac to iPhone with ease. Here are few reasons why using iTunes can be so much pain.
If you accidentally deleted or lost videos on iPhone, first please check on the Recently Deleted folder. Alternatively, you can use the professional tool Gihosoft iPhone Recovery to recover deleted iPhone videos from Camera Roll or some apps.
Export and save data from iDevices/iTunes backup/iCloud backup.
Only back up and restore data related to Messages, WhatsApp, WeChat.


